Application
Database Security
I
have used database in my application which stores some confidential data ,then
I can make it secure by using these
frameworks:
OpenSSl
SqlCipher
FMDB
SqlCipher has two version
Commercial and Free edition.
We will use Free edition:
I
will elaborate here step by step explanation to give security.
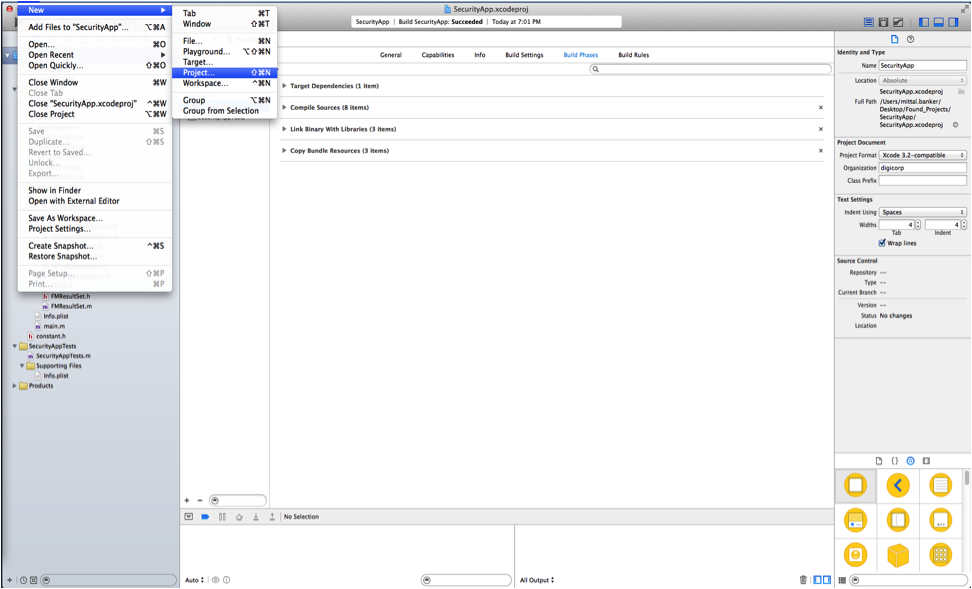
First create new project
from Xcode . I am using Xcode 6.1
OpenSSL
Download OpenSSl Version .
Then follow these much steps:
XCode project settings

Now that the XCode global preferences are setup we will move on to the project configuration.

Set build
architectures and CFLAGS
I downloaded openssl-1.0.1j.tar.gz (MD5) (SHA1) (PGP sign) [LATEST]
- Open Terminal
- Go to documents -> make one folder named code -> run this script as under
cd ~/Documents/code % curl -o openssl-1.0.1j.tar.gz http://www.openssl.org/source/openssl-1.0.0e.tar.gz
tar xzf openssl-1.0.0e.tar.gz
SQLCipher
% cd ~/Documents/code/SQLCipherApp % git clone https://github.com/sqlcipher/sqlcipher.git
Add OpenSSL
Source Tree
The OpenSSL XCode project includes a project template that relies on the OpenSSL configure and make system to build the libraries. However, it automatically detects the appropriate build settings for architecture (i386, x86_64, arvm6, armv7), build tools, and SDK. This makes it ideal for inclusion in an iPhone project.
Switch into your project's root directory and checkout the OpenSSL XCode project
SQLCipher uses sub-projects to manage build dependencies and static linking. Before writing code to use SQLCipher you must setup XCode, and your project, to build SQLCipher.
Now that the XCode global preferences are setup we will move on to the project configuration.
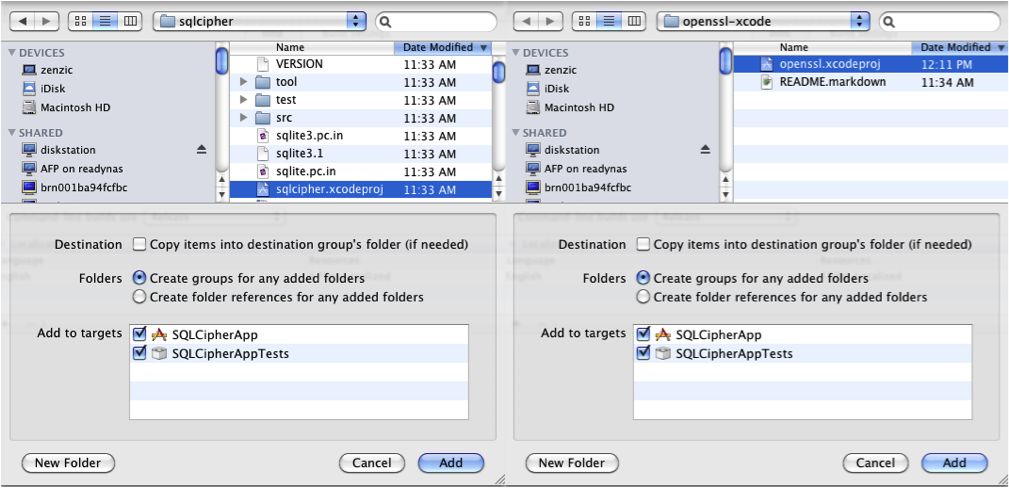
In the application project, click on the top level Project item. Right click on the project and choose "Add Files to "Project"", or press option-command-a, to add a re source. Navigate to the project directory, inside the sqlcipher folder, and add the sqlcipher.xcodeproj. If you have multiple targets, be sure to add the file to both. Repeat the same step for openssl-xcode/openssl.xcodeproj.
Add subproject
references
Configure build
dependencies
So if you’re still in development and need frequent access to your DB for debugging purposes, leave the encryption part to the end.
Be sure to verify the PGP and/or SHA1 signature of the archive before use.
Switch into your project's root directory and checkout the SQLCipher project code
OpenSSL can be tricky to compile properly from source. It's even more complex when you're dealing with multiple target architectures (iOS development targets i386 for the simulator but armv6 and armv7 for a device)

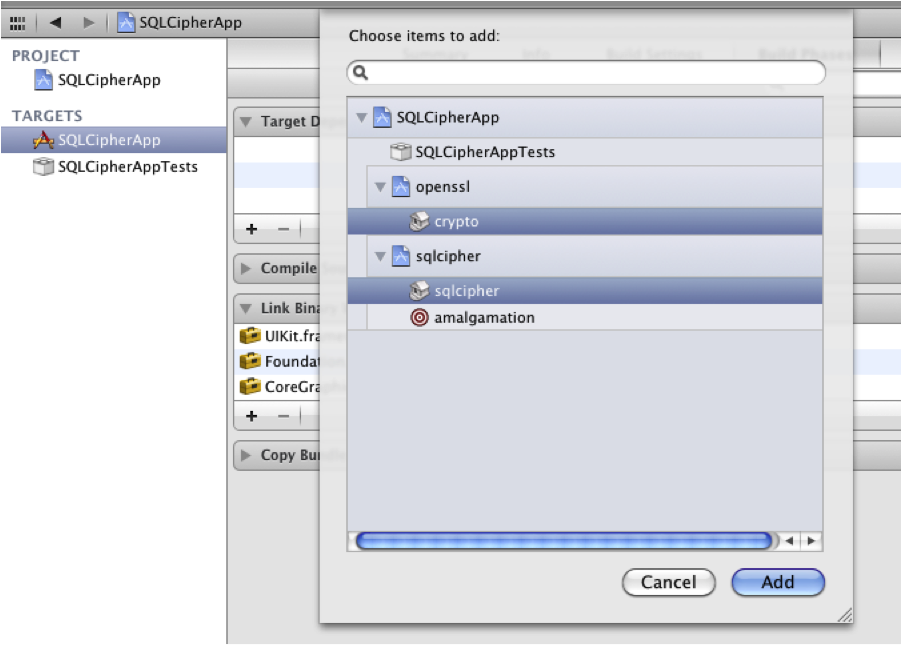
We must add build
dependencies to ensure that SQLCipher is compiled before the application code.
Select your application target and open the Info panel. Under the Build Phases
tab, in the Target Dependencies section, we will add both openssl/crypto and
sqlcipher/sqlcipher. Use Command-click to select both at once.
Then, under the Link Binary
With Libraries section, add libcrypto.a and libsqlcipher.a.
Make sure that
libsqlite3.dylib is not selected as a link dependency.
Add the same set of
dependencies and link settings to any other targets in your project that will
depend on SQLCipher, i.e. unit tests.
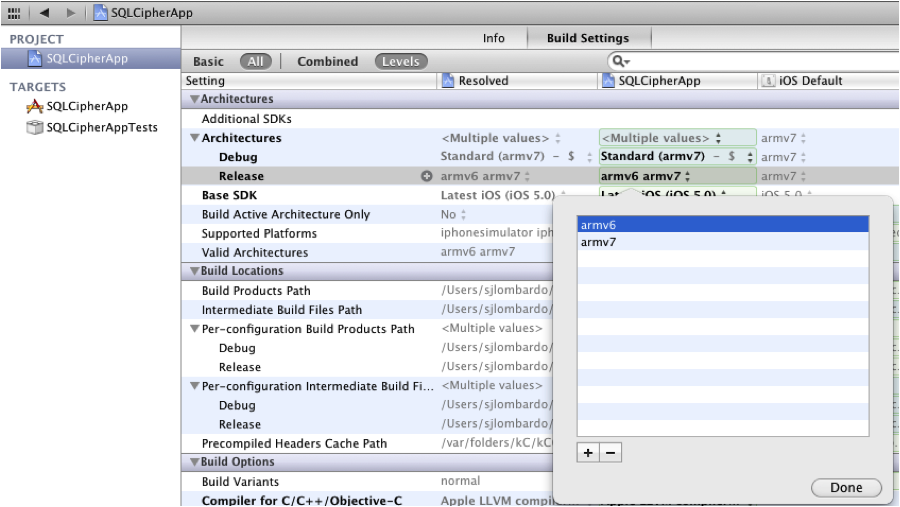
Select the top level project
and choose the Build Settings Tab, and expand the Architectures setting. Leave
the Debug setting as the default. Ensure the Release architectures are correct
(e.g. armv7 and armv7s for iOS, x86_64 for MacOS). Change them if necessary.
This will ensure that all dependent projects will be deployable on all desired
architectures.
Next, locate the Header
Search Paths setting, and add "sqlcipher" as a search path. This will
ensure that XCode can find the required header for the SQLCipher library.
Ensure that the "recursive" box is not
checked on the includes, or the build may fail.
Finally, under "Other C
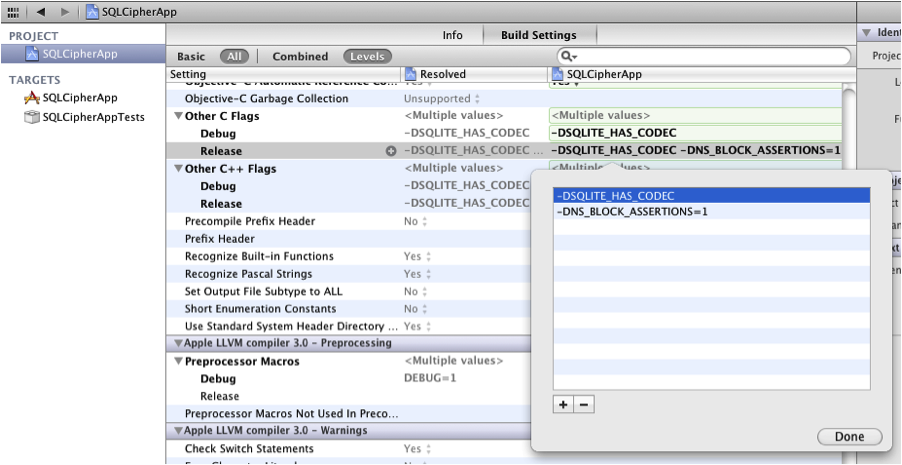
Flags", add -DSQLITE_HAS_CODEC to the Debug and Release C Flag settings.
This will ensure that the SQLite key management functions are defined for use
by the application.
NOTE:
If you choose to change either the build architectures or the
compiler used, you must apply the same changes to the build settings under the
openssl.xcodeproj and sqlcipher.xcodeproj. The three settings must match across
all projects.
At this point you should be
able to build the XCode project without errors. Note that the first time you
build the application for a particular architecture (Simulator for instance),
it will take much longer than usual. This is because SQLCipher and OpenSSL are
compiled from source for the specific architecture. You can keep track of the
status under Build Results. Subsequent builds for the same platform will be
much quicker since the libraries don’t need to be recompiled.

Sql Cipher Options:
If
you want to use Free edition use
If
you want to use Commercial Version use:
3) download FMDB
You
can download FMDB from here:
Here
I show you how to use FMDB wrapper with Sql Cipher with Database:
You
have to use two database here you have to attach encrypted database
- (BOOL)application:(UIApplication *)application didFinishLaunchingWithOptions:(NSDictionary *)launchOptions {
NSArray *documentPaths = NSSearchPathForDirectoriesInDomains(NSDocumentDirectory, NSUserDomainMask, YES);
NSString *documentDir = [documentPaths objectAtIndex:0];
self.databasePath = [documentDir stringByAppendingPathComponent:@"gameDefault.sqlite"];
[self createAndCheckDatabase]
}
NSArray *documentPaths = NSSearchPathForDirectoriesInDomains(NSDocumentDirectory, NSUserDomainMask, YES);
NSString *documentDir = [documentPaths objectAtIndex:0];
self.databasePath = [documentDir stringByAppendingPathComponent:@"gameDefault.sqlite"];
[self createAndCheckDatabase]
}
You’ll notice that I also call a separate method createAndCheckDatabase which actually do the verification I
told above and create a copy of the database file in case it does not exist in
the Documents folder.
NSArray *documentPaths = NSSearchPathForDirectoriesInDomains(NSDocumentDirectory, NSUserDomainMask, YES);
NSString *documentDir = [documentPaths objectAtIndex:0];
NSString *ecDB = [documentDir stringByAppendingPathComponent:@"encrypted.sqlite"];
// SQL Query. NOTE THAT DATABASE IS THE FULL PATH NOT ONLY THE NAME
const char* sqlQ = [[NSString stringWithFormat:@"ATTACH DATABASE '%@' AS encrypted KEY 'secretKey';",ecDB] UTF8String];
sqlite3 *unencrypted_DB;
if (sqlite3_open([self.databasePath UTF8String], &unencrypted_DB) == SQLITE_OK) {
// Attach empty encrypted database to unencrypted database
sqlite3_exec(unencrypted_DB, sqlQ, NULL, NULL, NULL);
// export database
sqlite3_exec(unencrypted_DB, "SELECT sqlcipher_export('encrypted');", NULL, NULL, NULL);
// Detach encrypted database
sqlite3_exec(unencrypted_DB, "DETACH DATABASE encrypted;", NULL, NULL, NULL);
sqlite3_close(unencrypted_DB);
}
else {
sqlite3_close(unencrypted_DB);
NSAssert1(NO, @"Failed to open database with message '%s'.", sqlite3_errmsg(unencrypted_DB));
}
self.databasePath = [documentDir stringByAppendingPathComponent:@"encrypted.sqlite"];
After you’ve done this, you’ll have your database in the
Documents folder where it will be accessible to the application to read/write.
So, in order for you to have an encrypted database, you’ll need
to create a new blank encrypted database and then ATTACH you existing database
to it. By attaching, you will have everything that you had in your unencrypted
database in the new encrypted one.
Let’s start by importing SQLite to your AppDelegate.m file. At
the top of you file add
Now inside of the createAndCheckDatabase method, add the
following below what we already have
Breaking down this code
1. In the first 3 lines we get the
Documents Directory path and set the NSString ecDB to that path with the new
database name.
2. Then we create the SQL Query we’re going to execute first to do the ATTACH. Note that we set 2 parameters in there, the DATABASE and the KEY. The DATABASE should be the full path to the encrypted database you want to create, in this case, string ecDB, and the KEY parameter is the key that’s going to be use to ENCRYPT your database, so choose a strong one
3. We then connect to the unencrypted
database and run 3 SQL Queries, the ATTACH, the EXPORT which will export the
new encrypted database with your data to the path you chose and finally the
DETACH to detach the database from the unencrypted file.
4. And the last command is the one
which will set my AppDelegate databasePath property to the new Encrypted
Database we created. In my case this is very important because in my classes, I
call AppDelegate to get the path to open the database
This part is now complete and you have your encrypted database.
If you go to your Application Documents folder you will now see 2 files,
gameDefault.sqlite and encrypted.sqlite.
Now comes the easy part. You should already have all your
methods to INSERT, UPDATE, CREATE, etc… in your code, so you should need just
to add a single line of code after every time you open the database.
.
If you try to open your encrypted db it’s not going to work
because you need your secret key. so add the setKey method after you open your
db
And you’re done! that should convert your existing DB into an
encrypted db.
FYI: I tried opening my encrypted database in several sqlite
browser programs and none could open because it was encrypted, but the code is
able to insert, update, delete, etc… to your db just fine.